Getting started
We will use Yarn to install Jest as a JavaScript dependency.
Firstly ensure that that you have yarn available:
$ yarn --version
v1.3.2
For full details, visit installing Yarn.
At the time of writing the recommended approach is to use homebrew for installing yarn:
brew install yarnCreating a new project
Firstly create a new directory where you want to run your project:
mkdir ~/Documents/jest-workshop
cd ~/Documents/jest-workshop
We can initialize a new package.json that will specify all of our project dependencies
via the yarn init command. You will asked various questions about this project, the
answers are not too important and can be left as their default value for the most part:
yarn initThis will generate a new package.json file similar to:
{
  "name": "jest-workshop",
  "version": "1.0.0",
  "main": "index.js",
  "license": "MIT"
}
For example:
Now we can install jest:
yarn add --dev jestThis command has also modified your package.json file:
{
  "name": "jest-workshop",
  "version": "1.0.0",
  "main": "index.js",
  "license": "MIT",
  "devDependencies": {    "jest": "^22.4.2"  }}
Let's define a script within our package.json file to run our test suite via jest:
{
  "name": "jest-workshop",
  "version": "1.0.0",
  "main": "index.js",
  "license": "MIT",
  "scripts": {    "test": "jest"  },  "devDependencies": {
    "jest": "^22.4.2"
  }
}
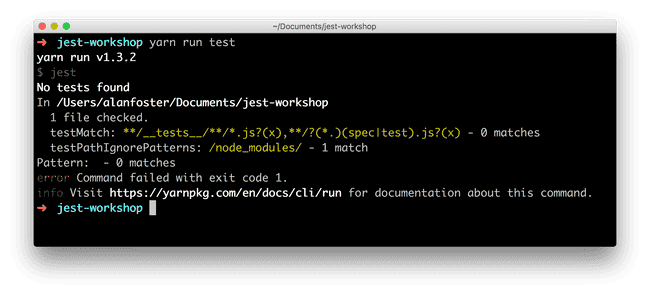
We can now run our JavaScript tests with the yarn run command:
Oops, no tests? Let's add some tests!
